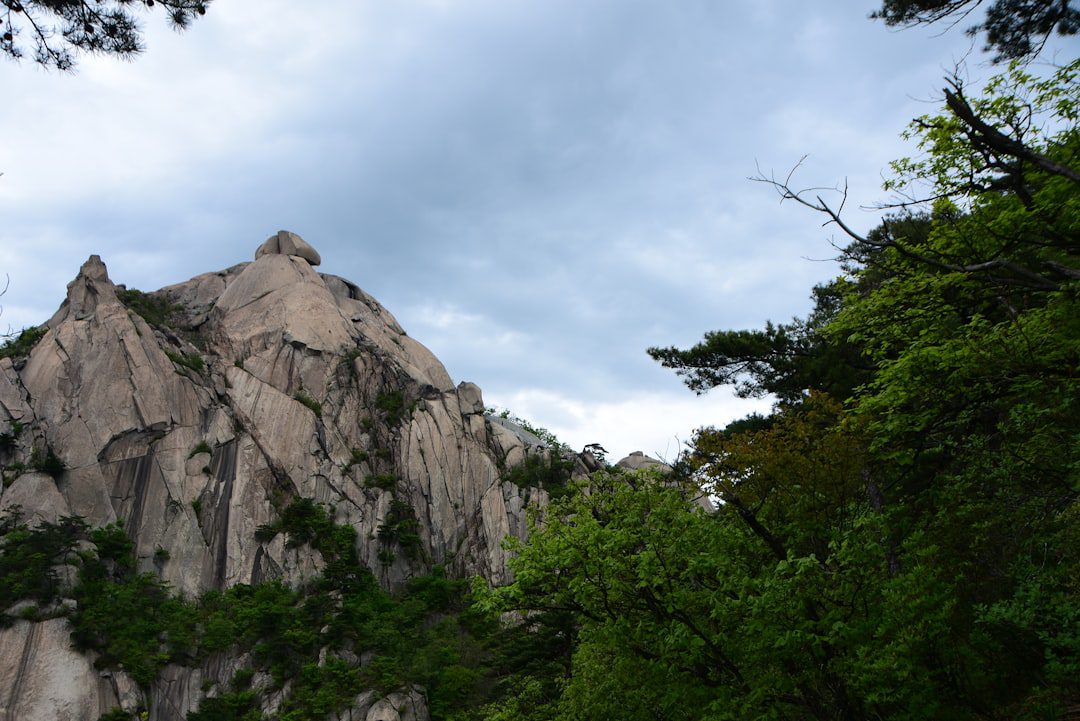
I’ll never forget the first time I hiked Bukhansan with my wife in 1992. We were young, overconfident, and completely unprepared — I wore jeans and canvas sneakers, she wore platform shoes. We made it about halfway up Baegundae peak before we had to turn back, humbled by the steep granite faces and our own stupidity. Three decades later, I’ve climbed Bukhansan’s main peaks more times than I can count, and I’ve made every mistake possible so you don’t have to.
Bukhansan National Park sits just 15 kilometers north of Seoul’s city center, making it the most accessible alpine hiking experience in Korea. It’s not a gentle nature walk — it’s a serious mountain with exposed granite peaks, cable-assisted climbs, and sections that’ll test your legs and nerves. But that’s exactly why Koreans love it. On any weekend, thousands of hikers tackle these trails, from office workers in their business casual to elderly grandmothers who’d put most tourists to shame.
Here’s everything you need to know about hiking Bukhansan, from which trail matches your fitness level to what to pack, where to start, and how to avoid the rookie mistakes that nearly derailed my first attempt.
Why Bukhansan Is Special: A Hiker’s Paradise 30 Minutes from Seoul
Bukhansan isn’t just another hiking spot — it’s Korea’s most-visited national park, attracting nearly 5 million visitors annually. You want to know why? Because it delivers genuine alpine terrain without requiring a 4-hour drive. The park spans 36.7 square kilometers across two main massifs: Bukhansan (Northern Mountain) and Dobongsan (Chestnut Peak), each with their own character and difficulty.
What makes Bukhansan different from typical Korean mountains is the granite. Unlike the forested peaks of other parks, Bukhansan features exposed granite faces, dramatic ridgelines, and sections where you’re literally climbing vertical rock with cables bolted into the stone. It’s thrilling, it’s humbling, and it’s why the mountain draws everyone from international visitors to serious climbers.
The park sits in Seoul’s Gangbuk-gu district, straddling the boundary between the city proper and Gyeonggi Province. This geographic quirk means you can start hiking at 9 AM and be back at your guesthouse drinking coffee by 4 PM — making Bukhansan ideal for day hikes with no overnight camping required.
Ted’s tip: Visit on a weekday if possible. Weekends bring massive crowds — I’m talking gridlock on the cables and 20-minute waits at bottleneck sections. Tuesday through Thursday mornings offer the most serene experience, though you’ll still encounter plenty of other hikers.
Getting to Bukhansan: Access Points & Subway Routes
Bukhansan has five main entry points, each with different trailheads and difficulty levels. The two most popular are Gireum and Suyu gates, both accessible by subway within 30 minutes from downtown Seoul.
| Entry Gate | Nearest Subway | Travel Time | Main Trails |
|---|---|---|---|
| Gireum Gate | Gireum Station (Line 4), Exit 1 | 25 mins from City Hall | Baegundae, Insubong (most crowded) |
| Suyu Gate | Suyu Station (Line 4), Exit 5 | 30 mins from City Hall | Bukhangsan main ridge, Bonghwasan |
| Donggye Gate | Gireum or Suyu Station (10-min walk) | 30 mins from City Hall | Insubong, Yeongyedae (fewer crowds) |
| Dobongsan Gate | Dobongsan Station (Line 1), Exit 1 | 45 mins from City Hall | Dobongsan peak (separate mountain) |
| Bulsajong Gate | Sangbong Station (Line 7), Exit 3 | 50 mins from City Hall | Sangbongsan, Byeolbongsan (quietest) |
I typically recommend Gireum Gate for first-time hikers tackling Baegundae, and Suyu Gate for experienced hikers wanting the full ridge walk. Donggye Gate is my secret pick — it feeds into the same trails but with roughly 30% fewer people.
From Gireum Station Exit 1, walk straight ahead for about 15 minutes along the road. You’ll pass convenience stores, ramyeon restaurants, and climbing gear shops. Follow the signs toward the park entrance. Entry is completely free — Bukhansan charges no admission fee, making it one of Korea’s most accessible outdoor experiences.
Ted’s tip: Grab a coffee and a kimbap from one of the restaurants near the gate. Prices are about ₩7,000–₩12,000, and starting your hike fueled beats empty-stomach regrets at 2 PM.
The Big Three Trails: Difficulty, Duration & What to Expect
Baegundae Peak Trail (백운대) — The Iconic Route
Baegundae is Bukhansan’s most recognizable peak — that photogenic granite dome you see on postcards. The Gireum Gate to Baegundae route is about 3.2 kilometers one way, taking 2–3 hours to ascend depending on fitness level and crowds.
The trail starts deceptively easy, winding through forest with gentle elevation gain. Around 1.5 kilometers in, things change. You’ll reach the base of Baegundae’s famous granite face — a nearly vertical wall where cables are bolted directly into the rock. This is where many tourists panic. The cables are absolutely secure (they’re installed by the national park with professional engineering), but the angle is steep — roughly 70 degrees. Your hands do about as much work as your legs.
The climb takes 30–45 minutes depending on traffic. Yes, traffic. During weekends, you might wait 10–15 minutes at particularly congested sections where two-way traffic funnels through tight cable sections. The trick is breathing and keeping your weight on your legs, not your arms. Push through the cables; don’t pull.
Once you summit (831 meters), the views justify every aching muscle. On clear days, you can see across Seoul’s entire northern expanse, the Han River, and even Korea’s central mountains. The summit area is crowded but manageable. Most hikers snack here for 20–30 minutes before descending.
Difficulty: Moderate to Moderately Difficult | Best for: Tourists, day-trippers, moderate fitness
Ted’s tip: Start by 7 AM on weekends to beat crowds. If you arrive after 9 AM, expect serious congestion on the cables. And here’s something most guides won’t tell you — the descent is actually tougher on knees than the ascent. Take your time, bend your knees, and use the cables for support going down.
Insubong Peak Trail (인수봉) — Technical & Scenic
Insubong is the technical performer of Bukhansan’s big three. It’s steeper, more technical, and considerably more exposed than Baegundae, but also significantly less crowded. The route is roughly 3 kilometers from Gireum or Donggye gate to the summit (708 meters), taking 2.5–3.5 hours.
Insubong demands rock climbing skills that go beyond cable-assisted scrambling. There are sections where you’re literally rock climbing — finding handholds, using your feet on the rock face, and trusting your grip strength. The cables are present but are often supplementary rather than primary tools. If Baegundae feels strenuous but manageable, Insubong will feel legitimately challenging.
The reward is superior views and far fewer people. While Baegundae’s summit can feel like a crowded plaza during peak hours, Insubong’s top often has fewer than a dozen people. The granite faces are more dramatic, the exposure more real, and the sense of accomplishment proportionally greater.
Difficulty: Difficult | Best for: Experienced hikers, climbers, those comfortable with exposure
Ted’s tip: Don’t underestimate Insubong. I’ve seen fit climbers from other countries turn back because they expected a cable-assisted hike and got a rock climbing challenge instead. Make sure you’re genuinely comfortable on vertical rock before attempting this. And bring climbing gloves if you have them — the granite gets sharp and hot in summer sun.
Main Ridge Traverse (주능선) — The Epic Route
The main ridge traverse is Bukhansan’s ultimate challenge — a 9–10 kilometer ridgeline linking multiple peaks with 5–7 significant climbs. Entry typically happens at Suyu Gate, traversing through Bonghwasan, Hyungjesan, and finishing at either Baegundae or Insubong depending on your energy level. This is a 6–8 hour commitment for experienced hikers.
The ridge traverse offers the most complete Bukhansan experience — you’re never in the dense forest, constantly alternating between technical scrambles and ridge walks with panoramic views. There’s minimal cable-assisted climbing; instead, you’re constantly problem-solving your way across natural granite terrain. Weather matters significantly on the ridge — exposure means wind, and fog can reduce visibility.
Difficulty: Very Difficult | Best for: Experienced hikers, mountaineers, full-day commitment
Ted’s tip: Save the main ridge for when you’ve already done Baegundae and Insubong separately. You’ll understand the mountain’s character better, and you’ll have the fitness baseline necessary. Start at Suyu Gate by 6 AM to finish before darkness.
Bukhansan’s Sister Mountain: Dobongsan Hiking
Bukhansan’s eastern neighbor, Dobongsan (도봉산), is technically a separate mountain but often lumped together in Bukhansan National Park discussions. It’s notably different in character — less dramatic granite, more forested, slightly less crowded, and arguably better for intermediate hikers.
The main Dobongsan peak sits at 740 meters, reachable in 2–3 hours from Dobongsan Gate. The trail features cables but less exposure than Baegundae. The approach winds through beautiful forest sections with several stream crossings (more prominent in spring and early summer).
What I love about Dobongsan is the diversity of nearby hikes. You can combine it with neighboring peaks like Sanghwangsan or Yongmun for longer routes, or take a shorter 1.5-hour loop if you’ve limited time. It’s less famous than Bukhansan proper, which is precisely why I sometimes prefer it.
Travel: Dobongsan Station (Line 1, Exit 1) is about 45 minutes from downtown. From the station, it’s a 5-minute walk to the gate.
Physical Preparation & Fitness Assessment
Let me be honest: Bukhansan is not a casual stroll. It’s a serious mountain that injures or kills an average of 2–3 people annually, usually due to falls on the cables or disorientation in fog. Most injuries happen to unprepared hikers who underestimate the technical sections or overestimate their own fitness.
Here’s a fitness reality check before you commit:
| Fitness Level | Recommended Trail | Key Demands | Experience Required |
|---|---|---|---|
| Beginner | Lower forest sections only (not peaks) | Sustained elevation gain | Hiking experience helpful |
| Intermediate | Baegundae from Gireum | Cable climbing, steep descents | Mountain hiking experience |
| Advanced | Insubong or ridge sections | Rock climbing skills, exposure comfort | Technical climbing background |
| Expert | Main ridge traverse | All terrain types, full-day endurance | Mountaineering experience |
Training Before Your Hike
If you’re a casual walker, don’t show up and attempt Baegundae. I’ve watched fit people bail halfway up the cables because their legs simply weren’t conditioned. Here’s what I recommend:
Two weeks before Bukhansan, do stair climbing 3–4 times weekly. Find a parking garage or stadium bleachers. Climb up and down for 20–30 minutes at a moderate pace. This builds the precise leg strength cables demand. Running cardio doesn’t prepare you; stair work does.
A week before, walk a local hill or mall stairs while carrying a loaded backpack (5–8 kilograms). This conditions your legs and teaches you how weight distribution affects balance on steep terrain.
If you’re genuinely unfit, do a practice hike to one of Korea’s easier mountains first. Nami Island offers gentler terrain that builds baseline fitness without intimidation.
What to Pack: The Essential Bukhansan Checklist
I’ve seen hikers show up with completely inadequate gear. One American woman wore a sundress and flip-flops (flip-flops!) and made it about 10 minutes before turning back in tears. Here’s exactly what you need:
| Category | Item | Why It Matters | Where to Buy |
|---|---|---|---|
| Footwear | Hiking boots (not sneakers) | Ankle support on technical terrain essential | Seoul hiking stores, Myeong-dong |
| Hydration | 2-3 liter backpack + water bottles | Dehydration causes falls and disorientation | GS25 convenience stores (₩2,000–₩3,000 per bottle) |
| Nutrition | Snacks: nuts, energy bars, dried fruit | Fuels muscles; prevents bonking | GS25, CU convenience stores |
| Protection | Sunscreen, sunglasses, hat | Granite reflects intense sun; UV exposure high | Any pharmacy or convenience store |
| Safety | First aid kit, whistle | Minor injuries common; whistle alerts rescuers | Outdoor stores near Gireum Station |
| Navigation | Phone with offline maps downloaded | Fog or disorientation can happen fast | Download Naver Map app before hiking |
| Weather | Lightweight rain jacket | Mountain weather changes rapidly | Quick-dry jackets at outdoor stores |
| Hands | Climbing gloves (optional but helpful) | Granite is sharp; gloves reduce blistering | Outdoor stores near trailheads |
Ted’s tip: Buy a proper hiking backpack (40–50 liters) with a hip belt. Your hips, not your shoulders, should carry the weight. Cheap backpacks cause shoulder and neck pain within an hour. Expect to spend ₩100,000–₩200,000 for a decent pack.
I usually pack less in summer, more in spring and fall. In winter, bring chemical hand warmers and extra layers — Bukhansan gets surprisingly cold at elevation, and wind on the ridge is serious.
Seasonal Considerations: When to Hike Bukhansan
Bukhansan is hikeable year-round, but each season offers different experiences and challenges.
| Season | Conditions | Crowds | Best Time | Challenges |
|---|---|---|---|---|
| Spring (Mar–May) | Mild, flowers blooming, streams full | VERY HIGH | April–early May | Extreme crowds on weekends; slippery wet rock |
| Summer (Jun–Aug) | Hot, humid, afternoon storms | Moderate (some avoid heat) | Early morning starts only | Dehydration risk, afternoon thunderstorms dangerous |
| Fall (Sep–Nov) | Clear skies, brilliant colors, perfect temps | HIGH | October | Crowded but worth it; slippery leaves |
| Winter (Dec–Feb) | Cold, icy in shaded sections, low humidity | Low | Clear days after snowmelt | Ice on cables dangerous; limited daylight |
My personal recommendation: Go in October. The weather is perfect (10–18°C), the views are crystal clear, and the foliage adds color to the granite. Yes, crowds exist, but they’re manageable if you start early. Avoid peak spring (April) and early fall (early October) on weekends — the mountain becomes a traffic jam.
Ted’s tip: Never hike Bukhansan in summer afternoon. Thunderstorms develop without warning, and a lightning strike on an exposed granite peak is a real risk. If you must hike summer, start by 6 AM and plan to summit by noon, with descent complete by 1 PM.
Safety Rules: Avoiding Common Mistakes
After 35 years in Korea and hundreds of Bukhansan hikes, I’ve witnessed nearly every mistake possible. Here’s what kills people or sends them to hospital:
Underestimating cable sections: The cables aren’t optional — they’re there because people fall without them. Don’t try to free-climb. Use both hands, move deliberately, and don’t rush even if hikers are behind you.
Poor footwear: Sneakers or casual shoes slip on wet rock. I saw a woman in heels attempt Baegundae (heels!). Proper hiking boots aren’t optional. Your ankles depend on it.
Running out of water: Dehydration causes disorientation and falls. Carry 2.5 liters minimum. If you finish a bottle, drink it. The trail has no water stations after the gate area.
Hiking in dense fog: Fog obscures the trail and cables. If visibility drops below 20 meters, turn back. Rescue teams are called out regularly to find lost hikers who thought they could navigate through pea-soup fog.
Sunset hikes: The hike takes longer than expected for new hikers. There’s no lighting on Bukhansan trails. If you’re on the mountain past 4 PM in winter or 5 PM in summer, you’ll be descending in darkness. Use a headlamp if you must, but it’s better to not get caught in this situation.
Going solo without telling anyone: Tell your guesthouse, hotel, or friend your planned route and expected return time. If something happens, people will know to search.
In case of genuine emergency on the mountain, call 112 (police emergency) or 119 (fire/rescue). Network coverage is generally good on main peaks, unreliable in valleys. Rescue teams are professional and respond quickly, but prevention is better than rescue.
Nearby Amenities: Where to Eat & Rest Before/After
The areas immediately around Gireum and Suyu gates have excellent hiking support infrastructure. This isn’t accident — thousands of hikers have created demand.
Pre-Hike Meals & Supplies
Near Gireum Gate, you’ll find a dozen restaurants specializing in hearty, hiker-friendly food. Most serve:
Doenjang-jjigae (soybean stew) — ₩8,000–₩10,000. Heavy on beans and vegetables, provides sustained energy.
Kimbap (rice rolls) — ₩6,000–₩8,000. Perfect portable snack for the trail.
Korean ginseng chicken soup (samgyetang) — ₩12,000–₩15,000. Expensive but genuinely restorative for tired legs.
For supplies, multiple GS25 and CU convenience stores line the approach to Gireum Gate. Prices are standard Seoul prices: water ₩2,000–₩3,000, energy bars ₩3,000–₩5,000, instant coffee ₩1,200.
Post-Hike Recovery
After descending, many hikers head to local jimjilbangs (Korean spa houses) for recovery. The nearest is Biryu Jjimjilbang, about 10 minutes’ walk from Gireum Gate. Cost is ₩15,000–₩20,000 for entry, and you can soak in hot water (excellent for sore legs), relax in a sauna, and sleep a few hours if needed.
Ted’s tip: Grab a post-hike meal at one of the restaurants near Gireum Station. I’m partial to the ramyeon shops — they’re open until late and offer that perfect carbs + broth + electrolyte combination your body craves after exertion.
Trail Maps & Navigation Resources
Modern navigation is critical. Here’s what works:
| Resource | Best For | How to Use | Cost |
|---|---|---|---|
| Naver Map (App) | Navigation, trail routes | Download offline map before hiking; follow hiking trails layer | Free |
| Paper trail maps | Reference, no battery dependency | Available at Gireum Station convenience stores or visitor centers | ₩3,000–₩5,000 |
| National Park Service website | Official trail information, closures | Visit bukhansan.knps.or.kr before hiking for updates | Free |
| Google Maps offline | Backup navigation | Download offline Seoul map as backup | Free |
I recommend combining two approaches: use Naver Map on your phone as primary navigation, and carry a physical paper map as backup. Paper maps don’t require battery, aren’t affected by spotty signal, and let you see the whole terrain at once.
Frequently Asked Questions
Is Bukhansan Harder Than Other Korean Mountains?
Yes, notably. Bukhansan’s exposed granite and cable-assisted climbing make it harder than forested mountains like Seoraksan’s easier trails or Songni Mountain. However, it’s more manageable than serious alpine peaks. Think of it as the “hard 5” out of a difficulty scale of 10.
How Long Does It Take to Hike Baegundae?
Typically 4–6 hours round-trip from Gireum Gate, including summit rest time. First-time hikers take 5–6 hours; experienced hikers 4–5 hours. Crowds add 30–60 minutes during peak times.
Can You Hike Bukhansan Year-Round?
Yes, but winter hikes require proper gear and experience. Icy sections and reduced daylight make winter challenging. Spring and fall are optimal; summer requires early starts to avoid afternoon thunderstorms.
Do I Need Special Equipment Like Ropes or Harnesses?
No. The cables are pre-installed. Regular hiking boots and a backpack are sufficient. Climbing gloves are optional but helpful.
What’s the Difference Between Gireum and Suyu Gates?
Gireum Gate feeds the most popular route (Baegundae, Insubong) and is busiest. Suyu Gate accesses the main ridge traverse and is better for advanced hikers wanting longer, less-crowded routes.
Are There Bathroom Facilities on the Mountain?
Limited. There’s one bathroom near Gireum Gate (free). No facilities on the trails. Plan accordingly and use the gate bathroom before ascending.
Can I Bring My Dog Hiking?
Technically yes in some areas, but I don’t recommend it for Bukhansan’s cable sections. Dogs struggle on vertical granite. Easier forest sections of the park are dog-friendly.
What Happens if Weather Turns Bad?
Descend immediately. Exposed granite is dangerous in storms. Many hikers have died during sudden weather deterioration. If fog, heavy rain, or lightning appears, abandon summit ambitions and descend carefully.
Final Thoughts
Bukhansan changed my relationship with Korea. As a young immigrant, hiking felt quintessentially Korean — this blend of physical challenge, community spirit (hikers helping each other on cables), and respect for nature. Thirty-five years later, I still hike Bukhansan regularly, though my pace has slowed and my knees remind me of climbs from decades past.
The mountain doesn’t care about your nationality, fitness level, or experience. It demands respect, preparation, and honesty about your limits. Hike within your capabilities, start early, bring water, and never let ego override safety. Do those things, and Bukhansan rewards you with vistas, challenge, and a genuine sense of accomplishment.
The mountain’s call is real. I hear it most in autumn, when the granite glows and thousands of Seoul residents escape the city for those peak views. You’ll understand what I mean the first time you summit and see the entire city below, mountains stretching toward the distant horizon.
— Ted K
Image Credits: Photos sourced from Unsplash. By using this site, you agree to our Privacy Policy and Disclaimer.